It’s not too often that I create a layout with just one photo. I always take too many pictures lots of photos. But every once in a while I dedicate a whole page to just one.
Digital layout with a single photo
These girls are not just teammates they are the best of friends who work hard together and have the most fun all summer long. I do have a ton of photos of them and their shenanigans, but this is one of my favorites.
Digital layout using Magical Scraps Galore Community of Tomorrow kit
I'm going to guess some of you know about digital scrap-booking. I've known about it for quite a while, but haven't really taken the time to get to know it until now. I had used a program Close to my Heart offered called Studio J. It was simple, you would pick a themed template that's already designed, add your own photos and make some customization (if you wanted) and then order prints of your layouts. It was a great tool for getting a lot of photos scrapped, helping us get "caught up".
Close to my Heart did away with this program years ago, I feel, too soon. Digital scrapping is more popular now. Most of us have a tablet or some portable device that makes it easy to work on your pages anywhere, anytime. I use a drawing program and purchase digital kits to make my layouts much the same as traditional pages by layering jpeg papers and png images of elements.
Test Track layout using Magical Scraps Galore Community of Tomorrow kit
I have not given up on traditional scrap-booking with paper, embellishments, sequins, glue and all the fun that goes along with it. There is no substitution for the textures, inks, glitters and layers you can feel. I just don't have time to go to my studio, lay out all my supplies, cut and glue and ink and stamp and distress etc. I have a job outside the home that takes up my precious free time. I have kids, busy teenage kids, who are living their best life and I'm the one driving them there. So maybe I get a couple hours here and there in the evenings or on the weekend for actual studio time.
Anniversary layout with elements from various digital scrap-booking kits
My wonderful, supportive husband realized I haven't been able to participate in the hobby I once loved so much that it was also my career. He thoughtfully bought me an Ipad Pro and Apple pencil for Christmas this year so I could make my art anywhere I wanted. I downloaded some apps. Some for photo editing, some for drawing and some for PDF editing. I watched youtube videos and searched Pinterest for tutorials. I sampled a few and even purchased some, finding the ones I liked that worked best for my needs.
Easter 2020 layout with Ginger Scraps Signs of Spring kit and DHD Cupcake kit
Now I'm on my way to getting more pages done digitally in one evening than what I've been able to make in 3 years. For me, the importance of scrap-booking has always been preserving memories. So whether my albums are full of thick embellished pages or prints of digital designs, I'm happy to be getting my families experiences archived.
I would love to know, do you digital scrap-book or are your layouts traditional paper, or perhaps hybrid?
Hello Readers,
I have been making changes with Your Memories Here and along the way have decided to drop the storefront and get back to the basics of just enjoying crafting for, well, the joy of crafting.
I'm not promoting any one company or product line. Just creating whatever makes me happy for my own personal use.
For the businesses I've worked with along the way, I am still available for free lance work, just contact me as you always have in the past.
Do you like Thin cuts? Do you know what Thin cuts are? The fun little metal dies that cut your papers, cardstock, glitter paper, etc. into words and shapes with your favorite diecut machine. I use Cuttlebug, because they made it in pretty blue ;) but you can also use Sizzix or Spellbinders or some other brands that I'm not aware of.
The Thin cuts I used today are the 'hello' and 'thanks' set from CTMH. They are perfectly sized for cards.
Thin Cuts—Hello & Thanks
Item Number: Z3259
I like to use both the cut image and the negative image of my cuts (don't want to waste any of that pretty paper)
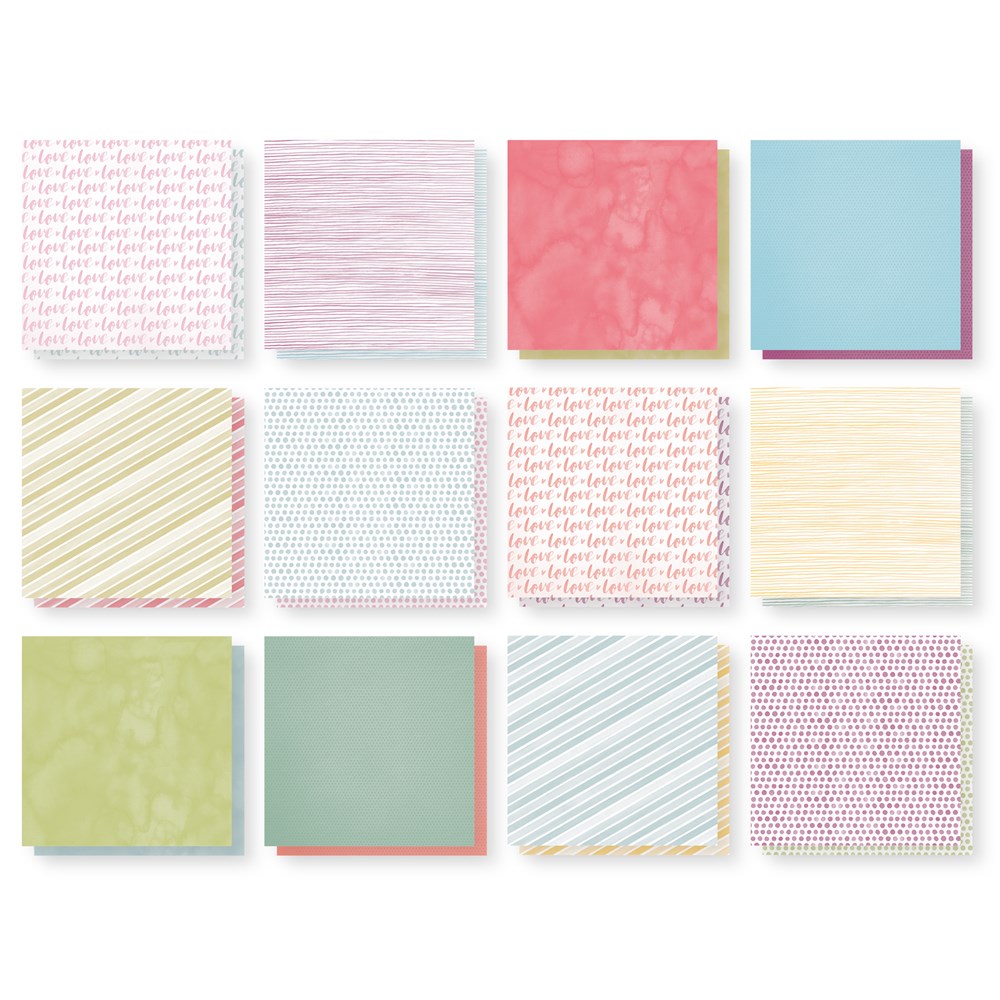
My patterned paper is from the Sugar Rush collection and the inspiration for colors.
I think the cuts alone are great for the card sentiments, but you can also add a little stamped sentiment too (which I did on a couple of the cards with the Short & Sweet A1189 and Sending Smiles D1708 )
Before you know it Christmas will be here. You're probably thinking 'we haven't even had turkey yet'. But that's the thing. We get so busy this time of year preparing for Thanksgiving that the Christmas season sneaks up on us. I like to get my Christmas cards out into the mail the day after Thanksgiving (or no later than December 1st) How can we do that if we don't start preparing now? For the next couple of weeks we're going to keep you inspired and motivated to get it done and be ready!
The first thing we can do to be prepared is make a list (and check it twice ;) ) of who you want to send a card to. Then you'll know just how many cards you need to make.
Check back tomorrow for our next tip on how to be prepared for the holiday season.
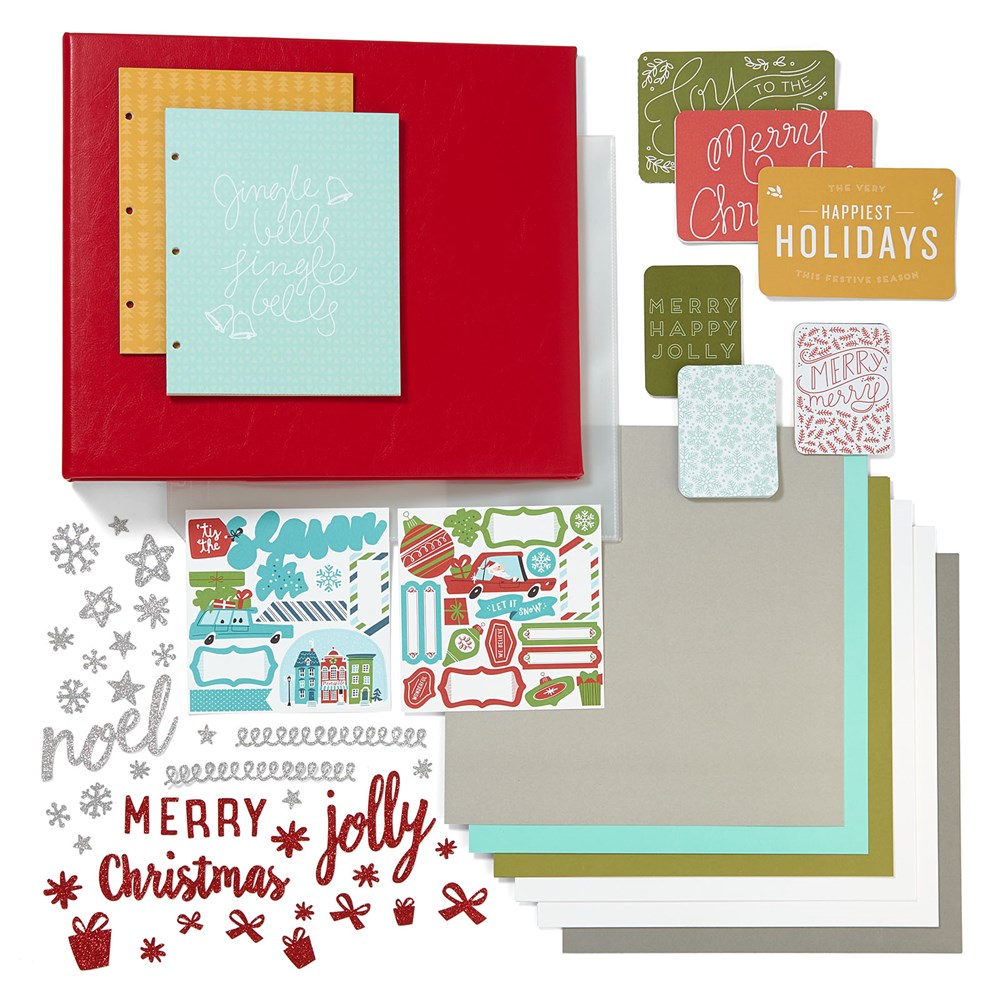
If you're a scrapbooker or maybe the person in charge of preserving your family's memories, check out the Happy Happy Christmas workshop. A bundle designed to help you be ready to preserve your family's Christmas memories and more!
The Happy, Happy Christmas Campaign features a workshop designed to help you have a happy, happy Christmas! We have made this workshop to help you create not only a beautiful Christmas album, just in time for the holiday season, but also to give you the materials to create four additional items that would make beautiful holiday gifts! It’s like getting five amazing projects all in one workshop!
During November, save over 10% off the retail value when you purchase one of the 12″ × 12″ album bundles (CC1179 and CC1180) for only $69.95 each! This bundle includes an exclusive guide to walk you through the steps of assembling five beautiful 2-page layouts. Add on additional items to make additional projects with your leftover materials, too!
I'm feeling so proud of myself, getting photos scrapbooked from an activity that just happened THIS MONTH! Well, I'm sure this feeling wont last long because I'm reminded that I am so far behind on getting other photos scrapbooked. But that's OK, we all need to have projects to work on.
Here is my double page layout of my trip to the pumpkin patch with my youngest daughter Lilee.
I was inspired by a layout I saw on Pinterest by Char's Crafty Creations. She used these papers from Swan Lake and the contrast of the dark background was really appealing to me.
For the title I used the "hello" 4x6" from the PML sheet and then I stamped "pumpkin" with my alphabet stamps in black ink. The leaves and pumpkins on these pages are cut on my Cricut and then water colored with inks. I made a video for you showing how I did this on the previous blog post.
On both layouts I added a 3x4" flip flap to the bottom photo so I could include more pictures from our day. Pigeon Roost Farm is more than just a pumpkin patch, there's a whole slew of things to do like a corn maze, slides, various farm animals and all sorts of other fun things. So I had taken a lot of pictures.
I'm working on my Pumpkin Patch layouts and needed some pumpkins and autumn foliage. So of course I go to my Cricut and cut some out. But I wanted them to be more dimensional and realistic so I colored them with my CTMH waterbased dye inks. And then I thought of all of you and didn't want to leave you wondering "how'd she do that?" So I made a quick video tutorial for you.
I hope you find it helpful.
Here's a little more of the details from the video:
The Cricut cartridge is CTMH Artbooking - Z3169
I used the following inks:
Canary- Z2843
Gold Rush - Z2823
Tangerine - Z2809
Poppy - Z2852
Fern - Z2850
I used the Small Round Water Brush - Z3224
The all purpose mat I used is way old and no longer available, but good news this one from CTMH is - Z2045
If you liked this video and found it helpful, please sign up for my email newsletters where I share more helpful information like this. The sign up form is located in my side bar over there >>>>>
Are you into multipurpose, versatility, MORE BANG FOR YOUR BUCK? Me too! I love when I can get more use out of my products. Sometimes an alternative use is obvious and sometimes we have to think a little outside the box. I'm happy to share my "out there" ideas with you.
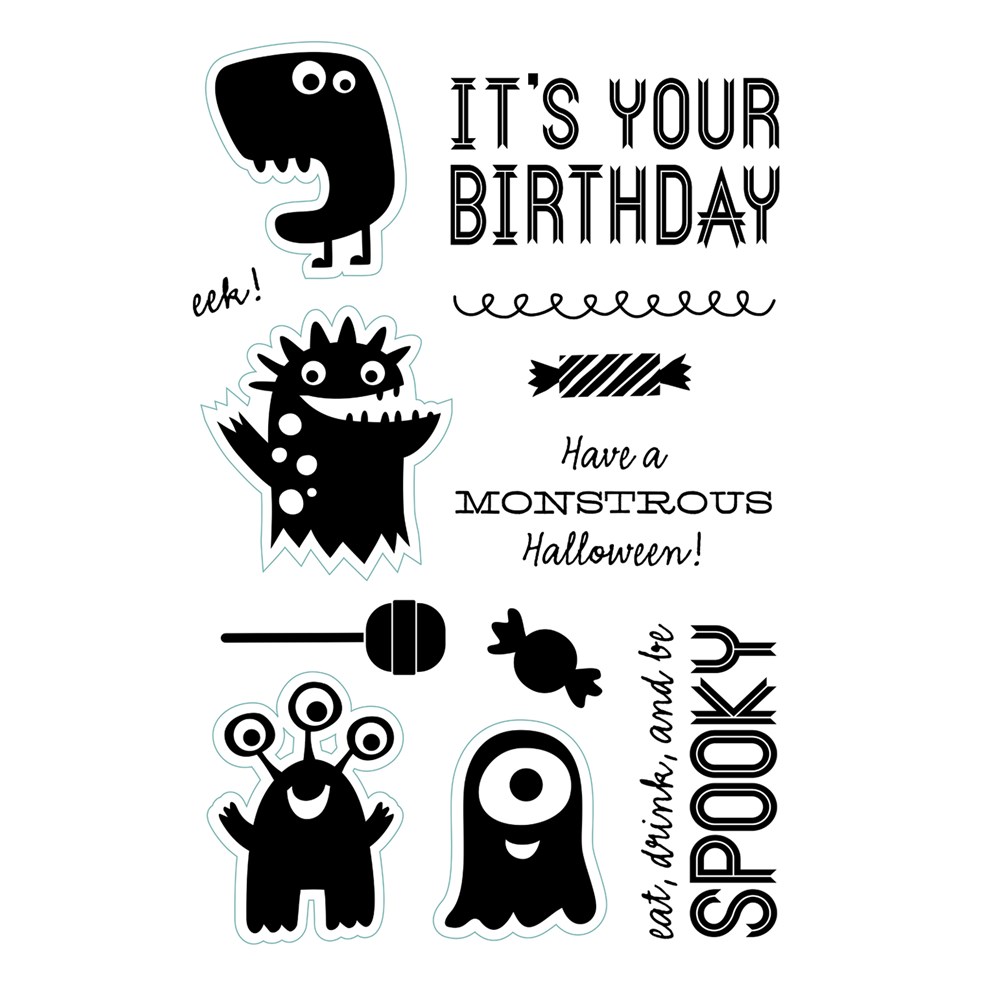
Monstrous Halloween
Item Number: C1652
This super cute Monstrous Halloween stamp set is perfect for Halloween and its also great for birthday cards (it does have a birthday sentiment) So you're able to get some use out of it beyond Halloween.
Here's a couple cute birthday cards I've come up with, perfect for a little boy (or girl or anyone who digs monsters and aliens)
And then there's this one, that doesn't even resemble the obvious choices.
If you'd like to see even more "out side the box" ideas and other creative crafty tips, sign up for my newsletter. I'll share project ideas, tips and fun stuff - nothing spamy EVER.
Sign up for creative tips, ideas and special offers.
Have you heard of One Sheet Wonder (or OSW) cards? They're these great way to use one piece of patterned paper (usually double sided) and create many cards/layouts/projects etc.
So far, every one I've found uses a "cutting guide" to tell you exactly how to cut apart your paper in various sizes and shapes (most often rectangles, squares and triangles) and then how you adhere those pieces to the front of your blank cards (and maybe add some stamping and embellishments) to create a lot of beautiful cards with only one sheet of paper.
For me, cutting all those little squares and strips and rectangles is really boring and I want to get right to the fun part of creating and decorating. You want to know another little secrete? Paper trimmers are not my friends. No mater how hard I try to make sure its lined up and on the correct measurement, I still manage to cut it crooked! Maybe it just me?
My solution, I use my Cricut for AS MUCH as I possibly can when designing projects. It does all the work for me! I just load my paper onto the mat and send it to cut and then all those little pieces are right there waiting on me to make something pretty (and correctly sized, might I add).
That is why I designed this one sheet wonder cut file.This cut file makes these 10 cards:
It takes just one 12"x12" sheet of B&T paper (and don't forget to save your zip strip too, those are bonus pretties). It uses all the paper with very little waste AND it DOES NOT require a cartridge! All you need is the Cricut Design Space program for your Cricut Explore (sorry this is for DS users only).
And because I designed it for myself, I didn't just use squares and rectangles and other straight edge shapes, I mean this is the Cricut so there's way more capabilities than those mean ol' trimmers that only cut straight lines. Here's 5 more cards using the same cut file:
Of course I want to share this cut file with you, so all of my newsletter subscribers will get the file emailed to them, along with how I chose to use it to assemble my cards shown here (but of course you can mix it up and make your own card designs too). Every time you use a different pattern paper you make a whole other set of cards! Here's a few examples of that:
If you want this cut file for Cricut Design Space just sign up for my newsletter and I'll email it to you!
My kids are off staying with my parents for their last week of summer break. What have I been doing while they're gone? NOTHING!!! OK not completely nothing, but none of my "mom" duties.
I did take some time yesterday to scrapbook. The August Stamp of the Month inspired me to create a layout with my favorite subject to photograph, my cats.
I may have been called a crazy cat lady once or twice. I don't think I'm obsessed, I just love my pets. They have their own personalities that make them endearing. I could go on and on about Walter and Mojito, but that might support the notion of how cat crazy I am ;) If you would like to learn more about these two, they have their own Instagram account @a_mojito_for_walter
So let's take a closer look at these pages:
The cats are also from the August SOTM set and I colored them to resemble my cats using watercolor paints and waterbrush. I have to admit, I wasn't a fan of watercolor painting at first, I preferred to use markers. But when I started using the paints with the waterbrushes it became so much more fun. The brushes give you the ability to add more water as needed and its a more controlled application. *Remember if you are stamping images to watercolor to use the Archival Black ink as the pigment and dye inks are water soluble*
Also I'm loving the CTMH color of the year Sea Glass and how it pairs beautifully with the Basics Fundamentals collections.
During the month of August, when you order our Whimsy, Adventure, and Enchantment Fundamental papers, you can choose to get either the Rustic Home or Uptown Fundamentals for FREE! Both of these Basics packets feature foil designs and specialty materials for making your artwork unique. Yep, this deal is basically the best!
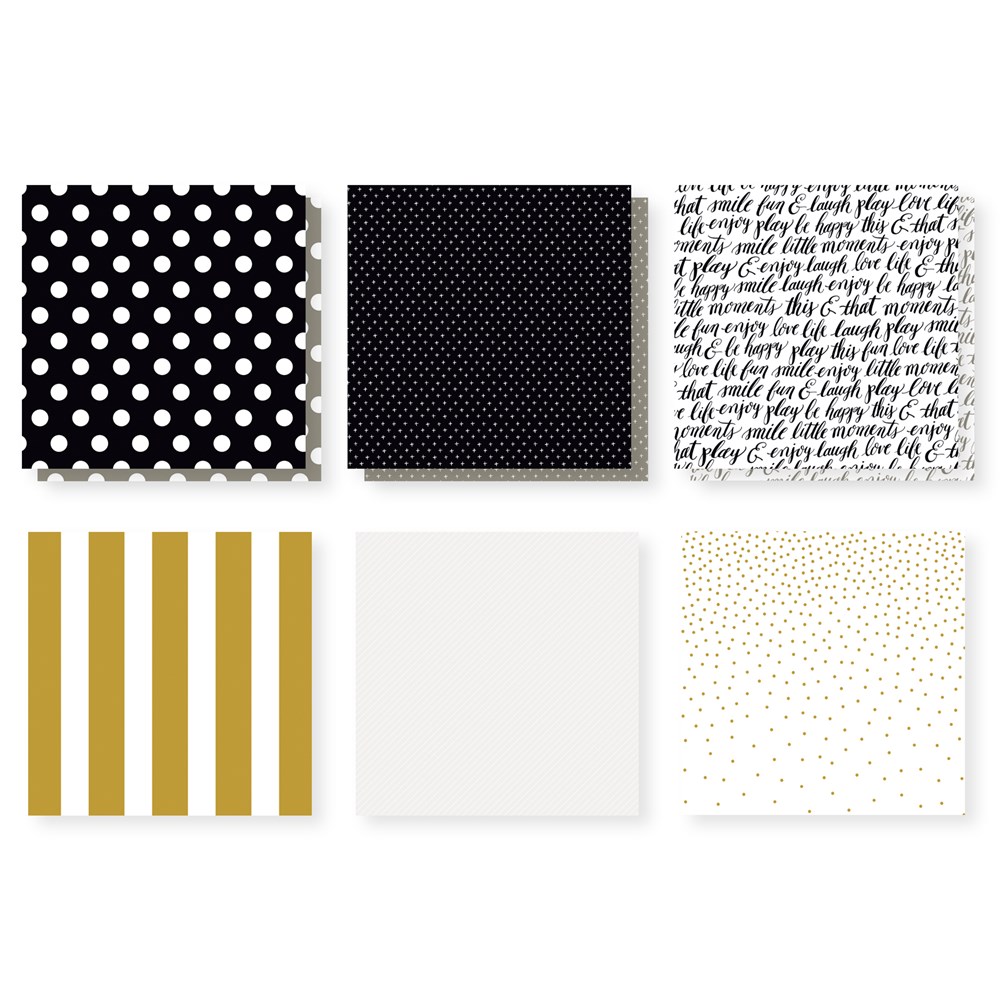
Today I'm sharing a card I created with the Uptown fundamentals from the Basics collection. But these papers are so much more than just basics.
Uptown Fundamentals Z3263
The black and white (and grey and white reverse side) patterns are neutral yet bold. The vellum and gold foil are great accents that go with any color palette.
For my card I paired the black and white paper with gold foil, which I cut into a star banner with my Cricut, and sea glass cardstock. I used white embossing powder so the "Birthday Wishes" sentiment would show up on the black paper. And for more sparkle and glitz I added a strip of sea glass glitter paper and gold shimmer trim. My daughter said it looks like a night sky party!
During the month of August you can get the Uptown Basics fundamentals for FREE!
With Basically the Best, when you order our Whimsy, Adventure, and Enchantment Fundamental papers, you can choose to get either the Rustic Home or Uptown Fundamentals for FREE! Both of these Basics packets feature foil designs and specialty materials for making your artwork unique. Yep, this deal is basically the best!
This brand new Cricut® collection features blooms and blossoms for every season of life. All of the designs feature botanical details of some kind, from flowers and leaves to branches and wreaths. Designed to span an entire year's worth of themes and occasions, this collection features shapes for holidays, cardmaking, and everyday scrapbooking. We know this collection will really grow on you!
For only $99 it includes
3 - My Acrylix® D-size stamp sets (valued at $17.95 each)
I have enjoyed previewing this collection and have a really pretty card to share with you today.
I made this really sweet flower pot card using the flower pot and hydrangea shapes on the cartridge.
The patterns on the flowers and leaves were made using the stamp sets that are included in the collection, as well as the card sentiments.
In Cricut Design Space I welded a basic shape to the hydrangea base so that there would be a "card" to slip inside the pot. Aside from stamping and gluing the layers, the Cricut does all the work for you.
I have the Design Space file here to share, all you need to do is purchase this collection and you'll be on your way to making Flower Market projects too.
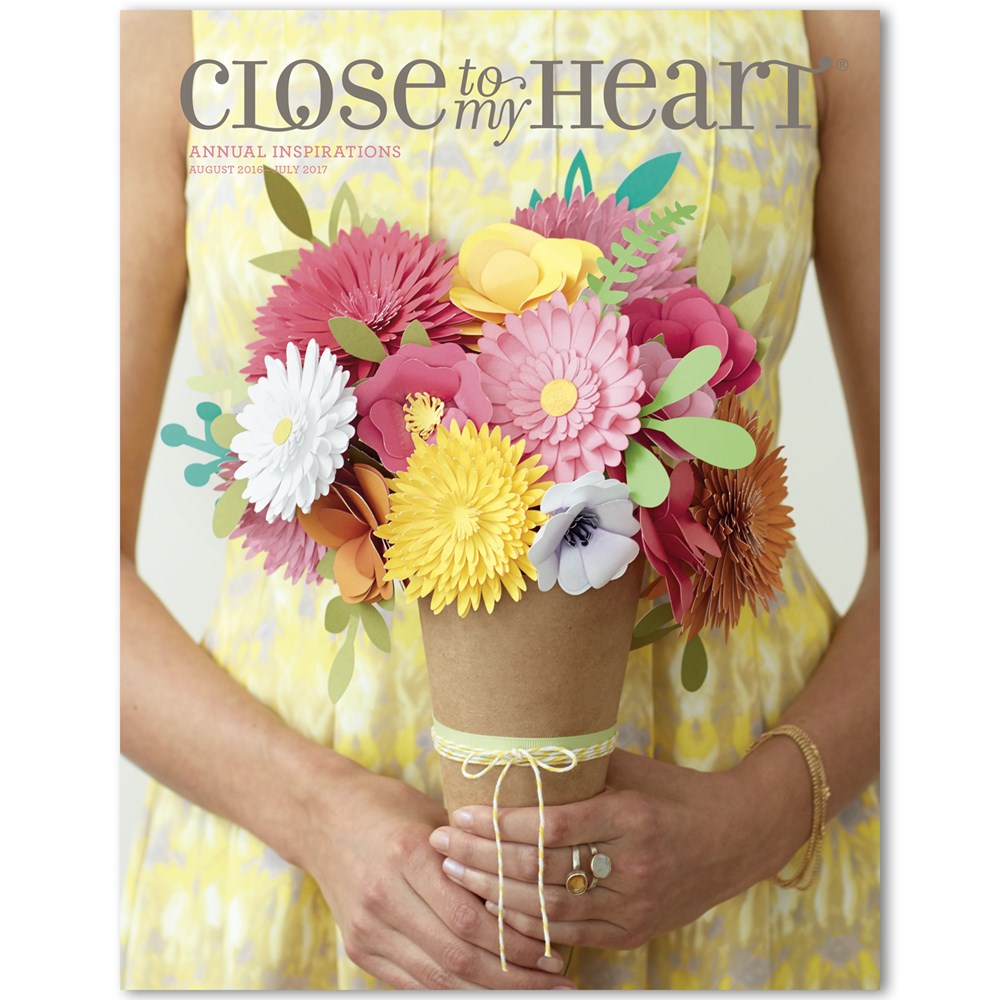
It is finally here! The new Close to my Heart Annual Inspirations idea book.
There's a lot of new products to check out. These are just a few of my favorites, but of you want to see them all you can order your copy of the Annual Inspirations or view it online HERE and of course you can browse the products via Your Memories Here Close to my Heart
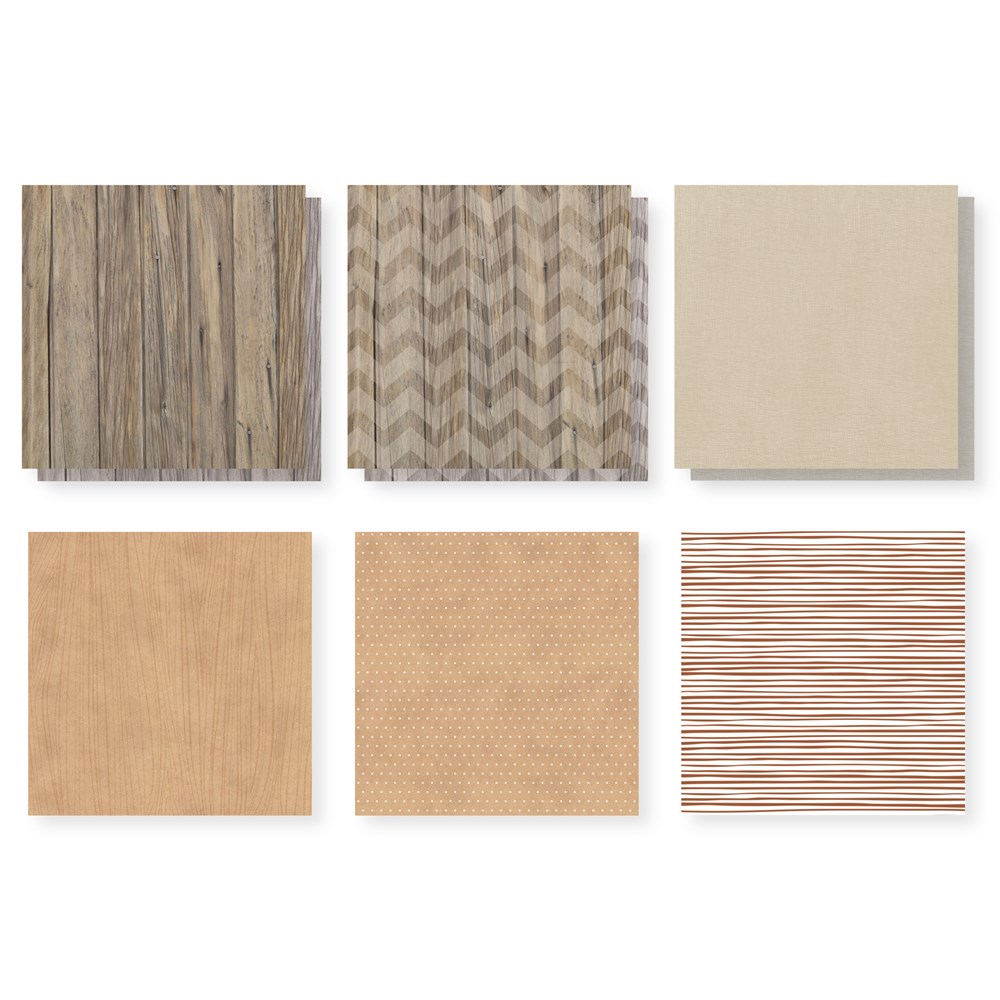
Rustic Home Fundamentals Z3262
Rustic Home Fundamentals paper neutral foundations that can be used with any color palette. Featuring woodgrain, some kraft paper, vellum and copper foil accents.
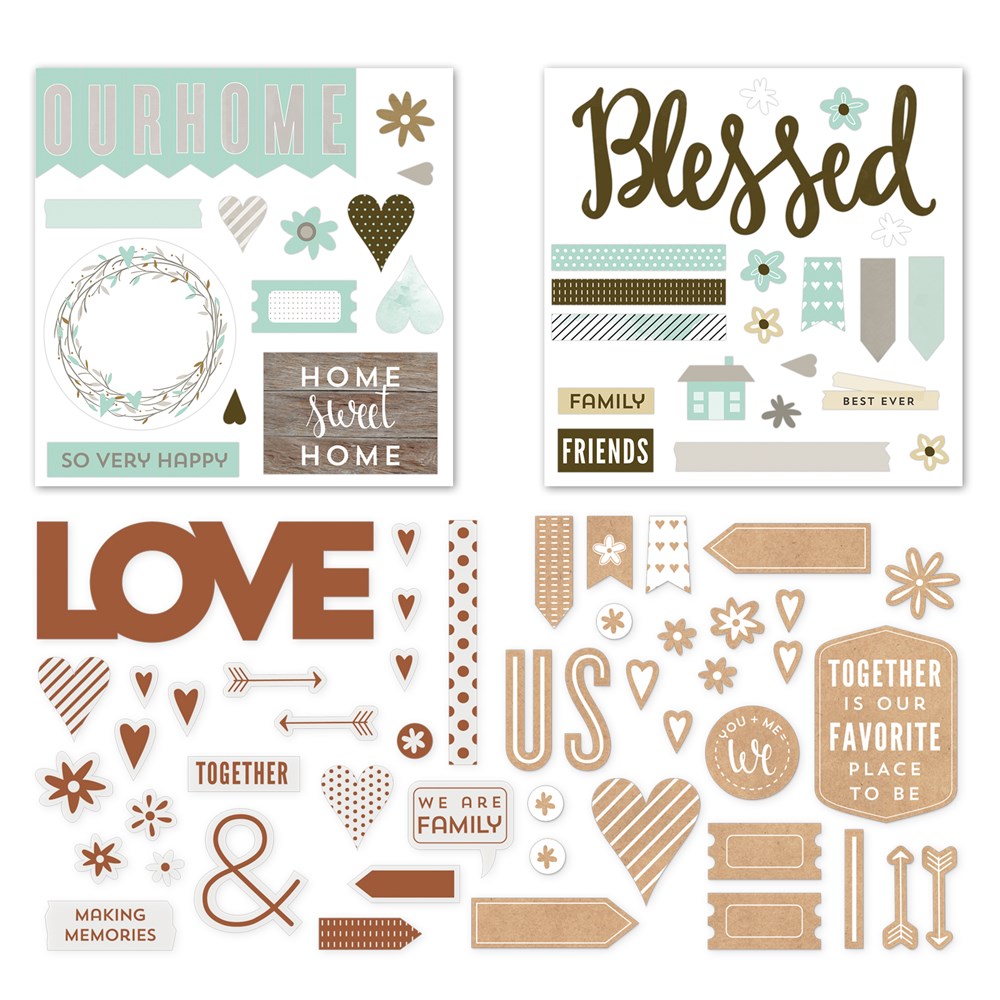
All Together Compliments coordinate with the Rustic fundamentals but are also great, stand alone stickers and kraft die-cuts featuring white foil accents, and vellum die-cut copper foil designs.
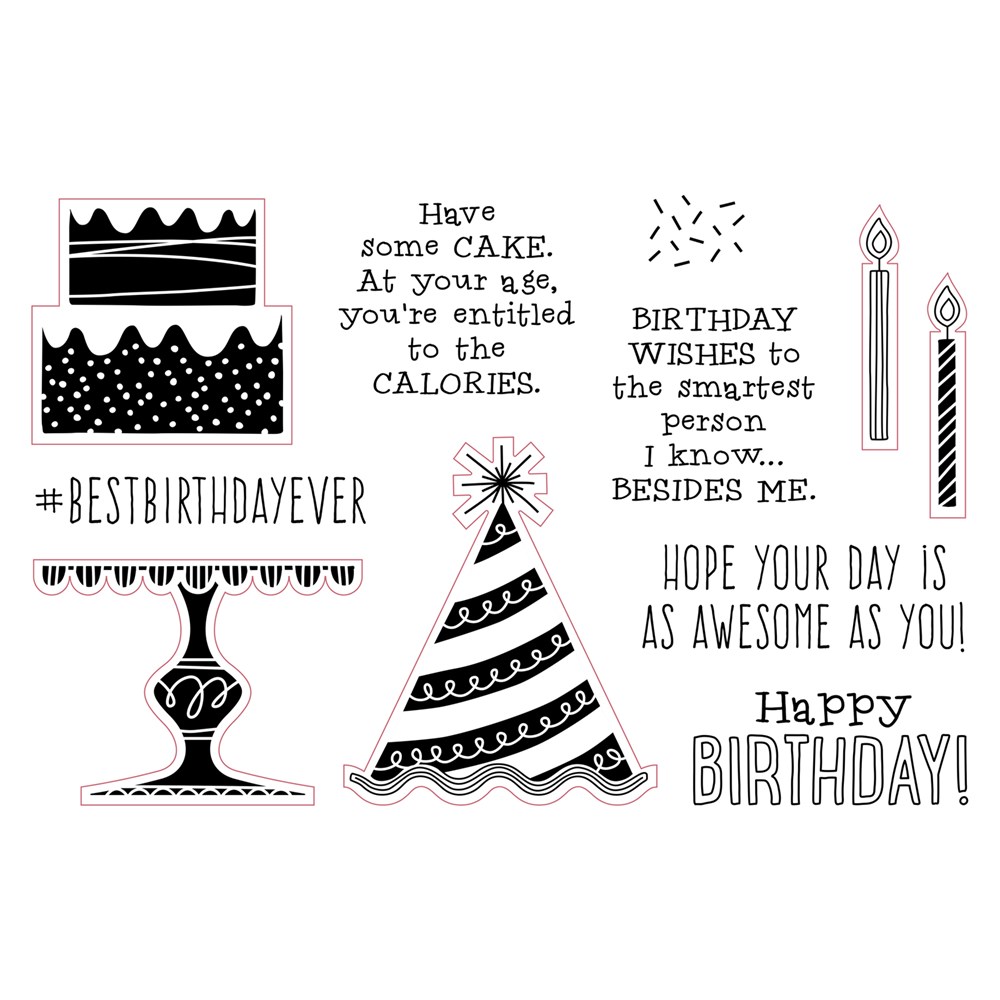
Wise Guy Birthday C1662
Wise Guy Birthday funny stamp set. I can foresee a lot of cards being made with this set!
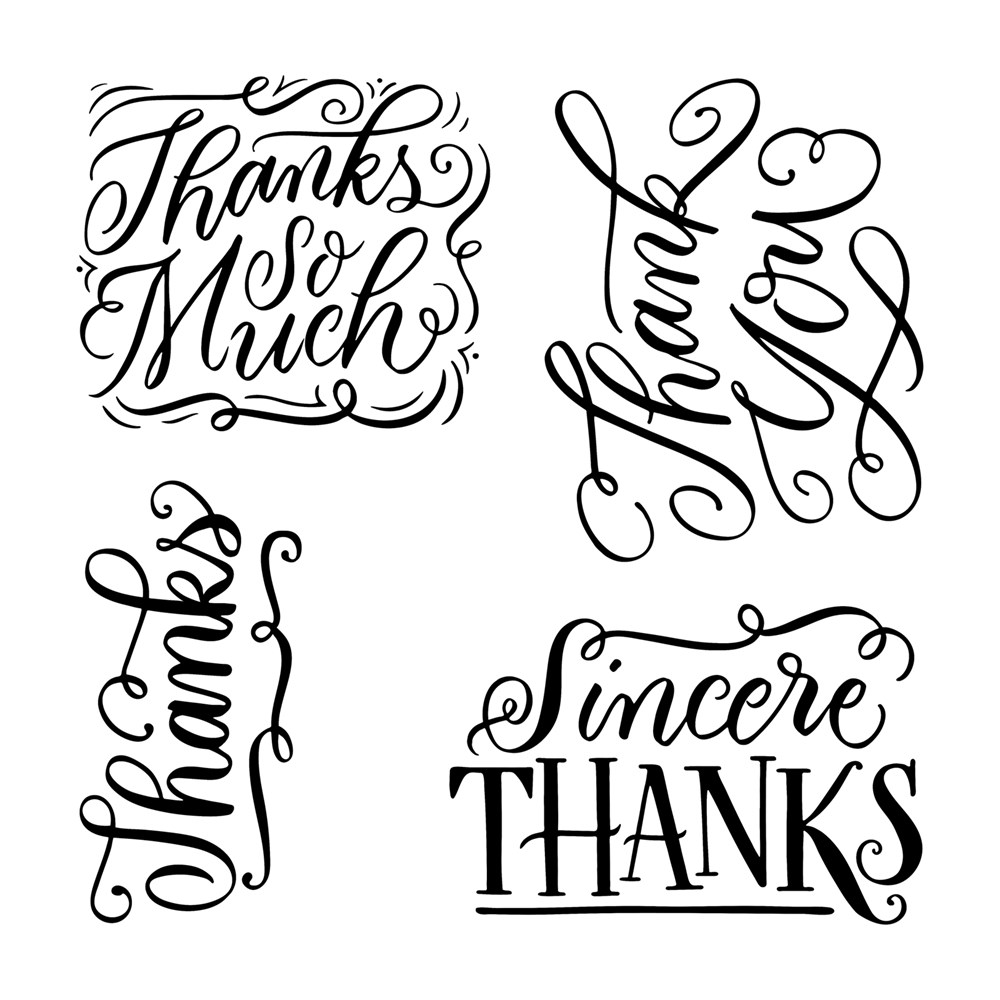
All the Thanks B1536
All the Thanks a really awesome all purpose thank you set.
There's also a NEW Cricut collection!
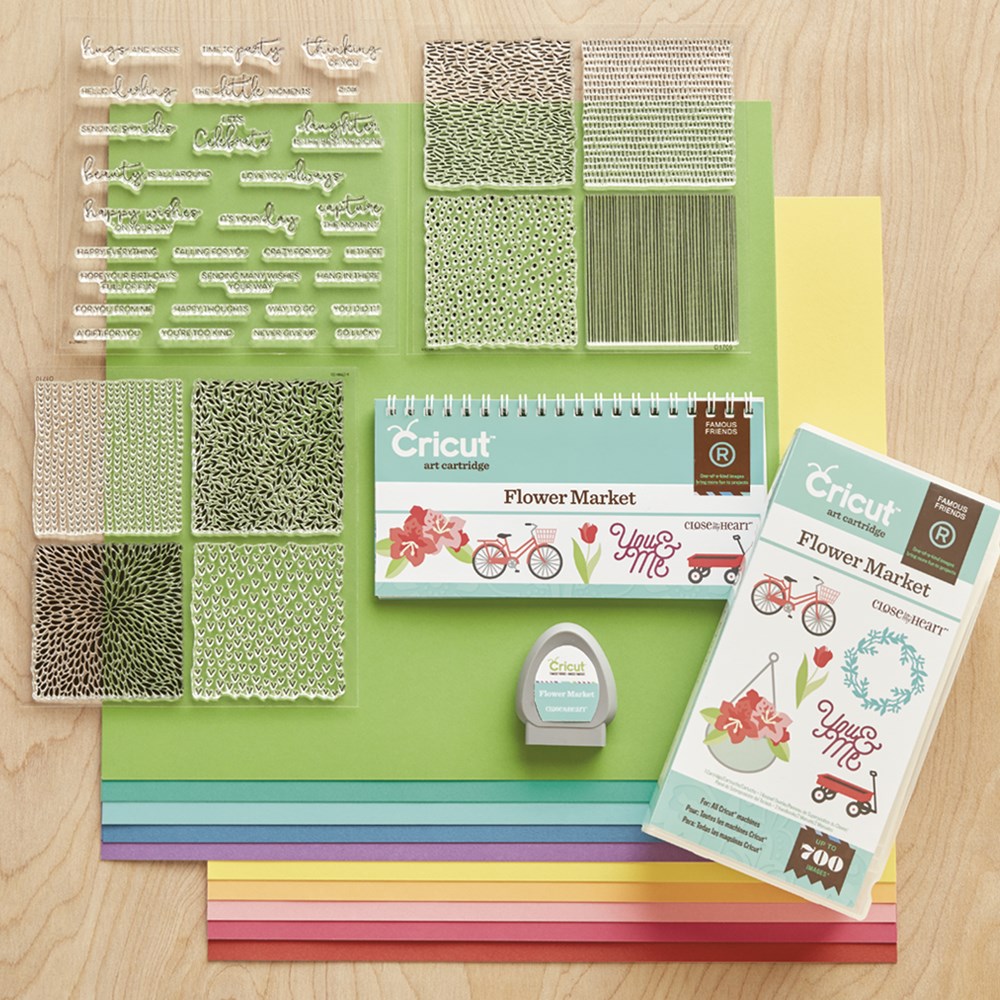
Cricut® Flower Market Collection Z3285
Cricut® Flower Market Collection for $99 it includes:
This brand new Cricut® collection features blooms and blossoms for every season of life. All of the designs feature botanical details of some kind, from flowers and leaves to branches and wreaths. Designed to span an entire year's worth of themes and occasions, this collection features shapes for holidays, cardmaking, and everyday scrapbooking. We know this collection will really grow on you!
I can't wait to share what I've been creating with this new cartridge!
It's also available as Flower Market digital format for the Cricut Explore and Explore Air. You get all the papers and stamps, just no cartridge, overlay or book - all of your images are accessible online with a code provided and it's only $79. That's what I have because I have no need for cartridges anymore with my Cricut Explore.
Please take a look through the new idea book and leave a comment here telling me what you're favorite new product is (besides those I've already listed). You'll be entered to win a new stamp set from me (this is NOT a Close to my Heart sponsored giveaway)
I've been to a few crafty workshops and I've hosted many, one question I hear a lot is "what should I bring?"
Attending a workshop isn't the same as an all day crop or weekend retreat. You really shouldn't need to bring much with you, just the essential tools. Most of the time pretty much everything is provided as part of the workshop cost, especially if its a pre-cut kit.
So what do I consider the essentials?
Consumable items like adhesives, products that you prefer to use that won't be part of the kit (ex. you like to ink or distress all of your edges bring your own mini ink pad), small portable tools that would be time consuming to share - like scissors and stamp blocks.You'll also want to bring a pencil so you can jot down notes or maybe marking measurements. This is the list I give to attendees of the workshops I host:
Spritz cleaner 1778 and Stamp scrubber Z1782 - to keep your stamps looking and working great
My Acrylix blocks Y1501 (the starter set of commonly used sizes) Y1002 also a common size
Pencil
Liquid Glass Z679 - not always essential but a great product to have on hand
3D Foam tape Z1151 for when you want to add some extra dimension to your projects
All of these items can fit into a small tote or craft organizer. Again, you're not going to an all day crop you don't need every product you own and the kitchen sink :)
If there is any specialty tool or item that doesn't fall under the "essential tool list" you will be advised ahead of time to bring it too.
I like to keep all of my essentials together in my tote/organizer and then when its time to craft, I just grab it and go.