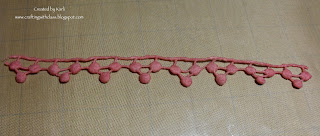
Do you have Glimmer Mist & want to die your ribbons to match the color but don't like messy, inky fingers :( Well, today I thought I'd share the way I dye my ribbon using Tattered Angels Glimmer Mist. I thought I'd make a little tut for ya.
Here we go:
You'll need a sandwich baggie, ribbon of your choice, & glimmer mist.
Spray some glimmer mist in the bag
Add your ribbon & seal the bag WELL. Make sure it's sealed (with a kiss if you want ;)
Add more dye until you reach the desired color.
Work the ribbon with your fingers (on the outside of the bag) so it's absorbing the glimmer mist.
Then you're ready to remove the ribbon from the bag & lay it flat on a protected surface.
Let it dry or if you're as impatient as I am, use your heat tool :) Remember to use a heat-resistant mat or surface.
Here it is dry & ready to use! You can see what I started with & the color I achieved. It will lighten a bit once it dries. But best of all, there's not a drop of glimmer mist on my hands! Dang, I should have taken a pic of that :(
Easy peasy! So what did I do with that ribbon trim?
This:
I made a simple little card :) I also sprayed the Prima Flower with Glimmer Mist as well, used pink satin ribbon for the ribbon ruffle, & stamped "Be Mine" to make a border. This card was a total CAS card for me!
You can find loads of yummy Tattered Angels Glimmer Mist colors, Prima flowers, & the Bella lace trim I used for my card (& others) at the YMH Store.
Thanks for peeking today & I hope this tut was helpful :)
Gotta Go!


