October 31, 2011

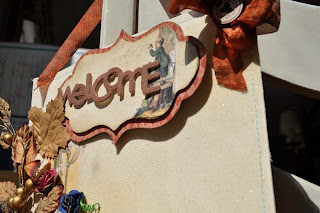
Happy Halloween-Haunted Birdhouse

Happy Halloween fellow crafters...
As I am not so patiently waiting and getting beyond excited for my Prima grab bag to arrive (all the way to Finland), 
I thought to create something Halloweeny (LOL) that I can put on my shelf as decor and then finally decided to make a haunted bird house.. I've seen lots of cute ones, which I think are gorgeous, but wanted to add a little Halloweeny twist to mine..
This was super simple to make.. 
just some sheets of chipboard, cardstock, decorative papers, distress inks, good glue, chalks , alphabet stamps and my handy dandy Cricut Expression ..
here are a few close ups:
Eeeeek..check out them creepy spiders..LOL
I amuse myself so easily..
I love this fence.. cute, I mean..Spooooooky..LOL


and for supplies used from the Your Memories Here store:

and from my own stash:
Chipboard sheets, cardstock, papers by Echo Park and my Cricut Expression

I want to thank you ladies for stopping by today and checking out what I've been up to.. 
I hope everyone has a very safe and happy halloween evening while out trick-or-treating with the little ones and the not so little ones :)
Hugs

October 30, 2011

Super Fast Sunday!


Good Evening bloggers!

I am so sorry this post is so late today! For those who are not aware I only get Sundays off on the weekends so my day is usually filled with the kajillion things that always need done...today was no different! Craft projects, family stuff, retail therapy, and last but not least...sofa surfing time (as I write this blog post that is!)

Anyway onto crafting goodies. We have been moving our daughter into the smaller of the two bedrooms upstairs this week..it seems that having a mini condo was not to her liking as it was far too much for her to keep up with (insert she didnt want to keep it all clean!) so with painting the new room covering the head board on her newish bed and all the assorted drama that goes with it (like JoAnn's telling me it was 2 yards of fabric when it was not even enough to go 3/4 of the way across the headboard...which meant another dash to the store) I managed to squeeze out a small bird house in the colours of her new room.
I used a small birdhouse I got from Pat Catan's and covered it in some Sassafras Lass papers I had in my stash. I inked the endges of the roofing tiles with Broken China Distress Ink and secured them with Helmar Decoupage Paste

The pom pom trim is too cute for words...I bought every colour that Kristina has in the store HERE and it matches the new head board to perfection!
The entire house was spritz with Glimmer Mist in Pearl and it has a lovely shimmer to it under lights. The cute little birdy was purchased at Hobby Lobby a while ago as well.

Dont forget to place your pre-order for the new Limited Edition Winter Distress Inks from Ranger...I know I will be buying a set of these gems!

Have a fabulous week everyone!

October 28, 2011

My new blog header....YMH

Hi everyone....Sandi here today to share my new blog header I made from beautiful goodies in the Prima Grab Bag bought at the Your Memories Here Store. I made it from the A4 Londonerry papers and used Prima flowers, lace, alphas, resin window, resist canvas shapes(colored with Glimmer Mist)and the brick stamp. Here are a few close ups:


 If you would like to try this for your own blog, this is what I did. I designed it to fit in a area that measured about 11 1/2 x 4 inches.  When I had it completed, I re sized it in Picnik(free photo editing and I use it all the time) to 960 x 400 to fit my blog and did a little editing. I didn't stick anything down so now I get to use those beauties again. Be sure to head to the store and get yourself some of those Prima goodies and check out my blog and let me know what ya think! Have a great weekend!

Sandi

October 27, 2011

Pretty Little Frame


I've got a pretty little frame for ya'll today. I took a simple (and cheap) frame and attacked it with lots of Prima goodness from YMH. I covered the frame with some Prima paper using Glaudine Hellmuth's Multi-medium. After I did that I went back and forth about sponging on ink or not. I finally decided not to. The next step was to for some bling to act as leaves in a way. I took several swirls and just cut them apart and layed them down where I wanted them. The flowers were colored using some glimmer mist except the cream color one. That came from a flower/butterfly combo. I had used the butterfly on a previous project and haven't known what to do with the flower. Today I took the center bling off and layered my other flower onto it. Now I need to find a quote to go in to for my home :)

October 26, 2011

Canvas Transfer


A while back, I did a tutorial on my blog where you could use Sticky Back Canvas and patterned paper to do a transfer.  I love the look of the patterns on canvas, but I don't always want to use sticky back canvas.  Recently I was watching a Live with Prima episode and found out you can do a similar technique using Multi Medium.

For this technique you will need your canvas (other fabrics will work as well, but I suggest you stick to lighter colors), multi medium, paint brush, patterned paper, and a water bottle.

Begin by placing a layer of multi medium onto the canvas where your paper image will go.  Remember, do not use words or numbers as inn the end you will have a reverse image, and unless you want to be reading your project in the mirror.....Adhere your image over the top being sure to press firmly. Let dry over night.

The next day, spritz the paper with a bit of water and use your finger to rub off the paper.  Yep, this step can be a bit messy.
When complete you should have something that looks like this.  The image may not be as bright and vibrant as it could be, but don't worry.
 If you would like to brighten it up, a quick coating of Mod Podge should do the trick.

Remember I told you I had more ideas for my A4 papers...this is one of them.  The papers have the perfect weight for this technique.
I covered my canvas with some beautiful Prima flowers, many of them brand new from my Your Memories Here grab bag!  I also used some of the new gorgeous Prima resins, leaves, alphas, and buttons also from my grab bag.  A bit of chipboard from 3Tails Craft and some seam binding I dyed with Glimmer Mist finished this project off.  
The new Prima florals are so gorgeous!  I love the rich fall colors.
sugar maple and suede glimmer mist and hay ride glam dyed the seam binding
love that cute little bird house from Prima
I really like this idea for a wall hanging and am thinking I should make another for Christmas soon.

Hugs.

Nancy

October 25, 2011

Thankful 4 U!


Hey everyone! So sorry for not posting last week...I've been battling some health issues but am doing so much better! I've finally got some projects to share, one of which is this clean and simple LO I whipped up featuring some super fun Cosmo Cricket projects from the Your Memories Here Store!


Now, on to the deets about my YMH DT project this week. Y'all know my love for Cosmo Cricket knows no bounds & I especially love that their collections mix n match so well! I also love that you can find some amazing Cosmo Cricket paper at super awesome prices RIGHT HERE in the YMH Store!! There are several collections available, including some I used here, at prices that you won't find anywhere else on the web...they are that fantastic. The photo itself is a recent one of me & my mommy in law at Lake Hefner Lighthouse in Oklahoma City. We spent an amazing day together doing some scrappy shopping & eating by the lake, then taking a stroll down by the lighthouse. It was a gorgeous day & am so very thankful (and blessed) to have such a great mom in law!


Supplies
Buttons - Cosmo Cricket 
Sketch - Sketches in Thyme 
Cardstock - The Paper Studio
Baker's Twine - The Twinery
Thickers - American Crafts
Adhesive - Glue Glider Pro, Pop Dots, Aileen's Fast Grab Tacky Glue


Thank y'all so much for stopping by! Make sure to stop by the YMH Store...which you can visit HERE for rockin' products like Tim Holtz, Prima, Cosmo Cricket, Tattered Angels and more! Until next week...Happy Craftin'!

October 24, 2011

Lil Shopper-DT project

Boy! These weeks are flying by and with that said, "Happy Monday fellow scrappers!"..

Its Nanné again and I want to share a layout I created for and of my daughter.. There are lots of layers and fussy cutting on this layout, plus my very favorites, Prima Flowers and E line Pearls.. I also ended up using my very favorite collection by Websters Pages..
So, Here is my layout:

White Prima flowers are just the best.. They go with anything and any color palette..
and I used Gemstone glue to glue down some string of Pearl..which was really quick, easy and no mess.
and for a few close ups of the layout:

 I only had two big red flowers that were the same, placed those on the bottom of the layout..so, I grabbed a big red Prima one from my stash and then distress inked the edges to match.. came out pretty good :)
these big Alabaster round petal roses are great, as is or you can glimmer mist any color.. 
I love working with them..

and finally a close up of my daughter.. This was taken last summer as her and boyfriend took a three day cruise over to Sweden.. the tile came from them doing nothing much, except for shopping..

and for supplies used:
These items you can find in the Your Memories Here store:

and from my own stash:
Websters Pages papers, string of pearls, MS Edge Punch, MS butterfly punch, green leaves, 
red flowers and small white flowers.

well.. I think that about does it for me for this Monday..
I want to thank you all so much for stopping by today and checking out my Monday project..
I hope everyone has a scrap-a-licious week..
hugs

October 23, 2011

Gorgeous Sunny Sunday!

And I am loving it!!!! It is a glorious day outside today and I am relishing in the sunshine. I have sat on my back deck eating my vegemite on real toast while sipping my coffee...this was made even more perfect by the fact I was watching a fawn frolic in our back yard.Anyway onto crafting projects. Today I decided to share the wreath I made for my front door for the Festive season. I have been busy with other projects but I cat share them as they are Christmas gifts.
The flowers are silver poinsettas from Prima. I got them along with the vine ad crystals last year with this idea in mind...but ever got to it sadly. The willow wreath I covered in white felt and sprayed it with Peppermint Glimmer Mist. I used some copper jewellery wire for to attache and dangle the baubles underneath.For now it is time to fall back into the scrap space to finish off another Christmas gift. Have a wonderful week everyone xx

October 21, 2011

Enjoy the Moments...Your Memories Here

Good morning to all my blogging friends. Sandi here today sharing a layout I made with some goodies from the Your Memories Here Store. This is a photo of dear hubby and I just didn't care...I was adding flowers.
I used Tim Holtz Kraft resist papers and MME Wild Asperagus. I did some misting using Tattered Angels Stencils and Oriental Poppy Glimmermist and did a little stamping behind the photo using the Tattered Angels Architectural Trim Stamps.


The funny thing is I had this layout completed when I received my Prima Grab bag and I was tearing stuff off and adding some of the new Prima Londonerry flowers, Prima Resist leaves and the Textured Alphas....that bag is amazing! I did some fussy cutting, random stitching and a few splatters of paint.

I made the bling using this tutorial and I also made some of the smaller flowers(brown,blue and beige ones)  using this tutorial
The vines surrounding the picture were bought at Dollerama and the burlap ribbon at Walmart. Next week, I have a different sort of project and what is so good about it is that you can use the supplies for your creation and when it's done you can use them again on another project...how good is that! Have I got ya wondering yet? That's it for me....so be sure to check and the store and I would love for you to visit my blog. Have a great weekend!

Sandi

October 19, 2011

Fun with Grab Bags

Hi everyone.  Nancy here to share with you a layout I made with the super fun grab bag I purchased in the Your Memories Here store.

I used more of my Prima Londonerry A4 papers for this layout, as well as many other great Prima finds from my Your Memories Here grab bag; a gorgeous flower, fun chipboards, beautiful metal trinkets with a bit of Prima lace.  As a matter of fact, everything on this layout other than the bits of cardstock (which you know I had to ink with Tim Holtz distress ink) is from Prima.  I kept the design fairly simple since I had so many photos on the page.

Here are a few close ups of the gorgeous embellishments.


Thanks for stopping by.

Nancy

October 17, 2011

Sharing Fall Memories

Happy Monday fellow Scrappers! 
Its my turn to share a little project with you today that I've been working on.. 
I used simple white cardstock, some Tim Holtz distress inks and a Prima Mask to create an original background to my fall themed layout.. This was a first for me, so I'm really pleased with how it came out..
I then used some Autumn themed papers I found in my stash, Prima flowers and Leaves, plus some ribbon and brads..
Here is what I ended up with:
I took several different colors of distress ink and applied them all over the edges of my white cardstock using the ink applicator, then held down the Prima Mask with my hand as I took the same colors of ink and smudged them all over the mask using the ink applicator.. 
Here you can see the white peeking through all of the ink.. 
It really was super easy..

I layered some papers, added a cute photo my daughter when she was a bay-beh..LOL
Then added a big fall colored Prima flower onto the bottom corner, some orange leaves, the Prima Ivy and finally an orange/white colored Prima flower to the top corner of the photo mat.
and last but not least, randomly placed some chipboard letters I found in my stash along the bottom of the Prima flower ivy, using foam tape squares..


and then for the supplies you will need to create a great layout using white cardstock, a  mask and some Inks..

from my own stash I used:
ribbon, brads, papers, stickers, distress tool, circle paper punch's and chipboard letters!!

well scrappers...That does for me for this Monday..Thank you all so much for stopping by today, I hope I have inspired you to take out your inks to play.. 
I truly don't believe there is a right way or a wrong way to ink up you layouts,  just your own way..LOL
Hope everyone has a wonderfully creative week.
Hugs

October 16, 2011

Rainy Sunday


Good Afternoon everyone!

Just a very quick post from me aka Terri today. I have been fighting migraines most of this week and today is no exception. I apologize for how brief this post is but I will add links a little later when I am able to cope with the bright lights.


Here is a quick and simple card I made for my inlaws 45th wedding anniversary. I used some of the new gorgeous mulberry papers from Prima from the Romantique line. These papers are just divine!!!! Edges are inked with Peeled Paint distress ink from Ranger. Flowers and lace are also Prima and you can purchase everything from the store...even better when you can grab it all in one place.


I hope you all have a wonderful afternoon...I will add the links for the products as soon as my head quits the bass drum impressions.

Posted using BlogPress from my iPhone